Pages

Showing posts with label Freezer Friendly. Show all posts

Sunday, January 31, 2021

Basic Pizza Crust

 Pizza. We love it all. (well, only if it doesn't have veggies on it 😆) I usually make pizza every other week, if not once a week. It is one meal that I know my whole family will love. If we have company I make multiple pizzas. You always win supper with homemade pizza.

This basic pizza dough recipe is how I start all my pizza recipes. It's easy to make and can easily make one large pizza or can be divided for smaller pizzas. Many times I make two batches so that I have enough recipe for garlic cheese bombs. (More on those later. They are so good.)

To make the dough, first you take 1 cup of warm water (110 to 115 degrees) and add it to a bowl with 1 packet (2 1/4 teaspoons) of active dry yeast. The temperature is important here. If the water is too hot it will kill the yeast and your dough won't rise. If the water is too cool it may take longer to rise. I then sprinkle some of the sugar on top to help get the yeast going. 


Once the yeast has developed some foam, I add my remaining ingredients and mix with my dough hook. Once the ingredients are combined I knead the dough for about 5-8 minutes with the dough hook. You will know the dough is ready once it comes together in a ball. Place the dough in a greased bowl and cover.  Let it rise until doubled, about an hour. 


Before rising

After rising
 

You can also freeze this dough for later. Just put it in a freezer ziploc bag after it has been kneaded and before you let it rise. When you are ready to use it, get it out the night before, put in a greased bowl, cover, and let rise in the fridge. You can also let it rise on the counter for 3-4 hours.

Once the dough has risen, you can punch it down and divide it into the portions that you will need. You can make one large pizza with thick crust, several individual pizzas, or two pizzas. It really is up to you and your preferences. The kids love when I pinch off enough for them to make individual mini pizzas. However I normally divide this dough into two equal parts to make two pizzas with a thinner crust. Or, you can make one pizza and some of those yummy garlic cheese bombs I mentioned earlier. If I divide the dough in half, I can get one 12 inch pizza with thin crust and a dozen garlic cheese bombs.

After the dough has risen, it is time to make the pizza! Roll your dough out the way you like and poke the surface with a fork. This will prevent any huge air bubbles from forming while it bakes. Prebake your crust for about 7-8 minutes in a 425 degree oven, or until the crust barely starts to develop some golden brown spots. 


 Next, add your sauce and toppings. Pepperoni and Italian sausage are my usual go to toppings. Bake for about 20 minutes in a 425 degree oven or until the cheese is golden.

Turn your next pizza night up a notch with this easy homemade crust!


Basic Pizza Crust

Basic Pizza Crust
Author: The Marigold Kitchen

Ingredients

  • 1 packet active dry yeast (2 1/4 teaspoons)
  • 1 cup warm water (110 to 115 degrees)
  • 2 tablespoons sugar
  • 1/2 teaspoon salt
  • 2 tablespoons olive oil
  • 2 to 2 1/2 cups flour

Instructions

  1. In a bowl, add the yeast and sprinkle on 1 teaspoon of the sugar. Add the warm water and stir. Let sit until the yeast becomes foamy.
  2. Add the remaining sugar, salt, oil, and flour and mix with the dough hook. Start with 2 cups flour, and add more if needed to make the dough come together.
  3. Knead with the dough hook for about 5-7 minutes.
  4. Place the dough in a greased bowl and let rise until double, about an hour.

Tuesday, July 21, 2020

Freezing Sweet Corn

I've been busy freezing sweet corn! I've already put almost 20 bags in the freezer for us to enjoy all winter long. Who doesn't love that sweet taste of summer in the cold winter months? We love it for eating, stirred into soups, and mixed in casseroles. This no-cook method is super easy and doesn't use any fancy gadgets. I've been using this method for freezing sweet corn for many years now. 


Here is what you need:
16 cups corn (this can be anywhere from 2-3 dozen, depending on the size of the ears and kernels)
4 cups water
1/4 cup canning salt
3/4 cup sugar

1. Prepare your space. Here are some tips:
 - I lay down an old sheet on the floor to help make clean up easier. When I'm done, I pick it up, shake it off outside, and toss it in the wash!
 - A bath towel on the counter works great to set all your washed corn on.
 - I use my glass pyrex measuring cups to help me measure the water and corn.
 - A large pan is great for cutting the corn into. The sides of the pan catch most of the corn that wants to bounce around and fly across the counter. I have an 11x15 pan with two inch sides that I love for this.
 - You will need a large bowl for mixing the corn with the brine.
 - A large tub is handy for collecting all the cobs after you have cut the kernels off.

2. Husk and wash the corn. Try to get all the silk off that you possibly can. I do this by hand. I've tried different types of brushes that are designed specifically for removing silk, but haven't found one that I love. I've also noticed that some of the brushes can scratch the kernels. If you have one you love, let me know so I can try it.


3. Prepare your brine. In a bowl, measure 4 cups water, 1/4 cup canning salt, and 3/4 sugar. Stir until the salt and sugar dissolve. I usually take breaks from cutting kernels off the cob to stir.


4. Cut the kernels off the cob. Many people prefer to use an electric knife for this, I prefer to cut with some man power.


5. Mix the corn and the brine together. Make sure the salt and sugar are fully dissolved before mixing together. I also like to add some extra water at this point, just to make sure that there is enough brine, especially if you have a little over the 16 cups of corn. I just add enough until the water is almost even with the corn. (I forgot to take pics at this point, which bothers me because I wanted to show you what it looked like. Ugh.)

6. Scoop your corn into freezer bags. I like to use a 1 cup measuring cup and scoop out two cups per quart freezer bag because that is about how much my family will eat. It's also the amount I need for soups and casseroles that I make. I know people who fill the quart bags completely full. It's really a preference as to how full you fill the bags. When closing the bag make sure to force as much air out as you can. Be sure to write the date on the bag. (Again, forgot to take pics. I was watching reruns of Fixer Upper while freezing corn, so I'll blame my forgetfulness on being distracted by Chip and Joanna.)

7. Freeze your corn. I lay the bags down in the freezer so that the bags freeze flat and skinny. I also spread them out so they freeze faster. You can see in the pics how I have them spread out. Once they are frozen, I stack the bags. I would use the corn up within 9 months.


8. When you are ready to eat your corn, thaw it out and drain the brine from the corn. Warm the corn on the stove over medium heat with some butter until it is heated through and the butter is melted. Add your choice of seasonings to taste.

This method of freezing sweet corn really can't be much easier, you just need the time. Try it! You'll thank me later. :)

Friday, May 15, 2020

Basic Meatloaf

If you need a basic meatloaf recipe, look no further. This is the one that you need. My family likes to have a simple meatloaf once in a while, and after years of adjusting amounts and spices here or there, this is the one that they love the most. I love that since my family is small and my kids are young, I can actually get by with baking only half of this meatloaf and putting half in the freezer for later. That certainly helps on a busy weeknight!
I also like this recipe because I can use both ground pork and ground beef. I'm always looking for ideas to use ground pork because I don't always like it as a substitute for ground beef. Ground pork doesn't always work well in place of ground beef in some recipes. But the mix of both of the meats in this meatloaf is perfect. I also think that this bakes up less greasy than other meatloaf recipes because of the use of oatmeal instead of breadcrumbs.
We usually eat this with baked potatoes and corn. It's the way I ate it while growing up, so it's how I serve it now. Plus the potatoes can bake while the meatloaf bakes, making supper that much easier!


Basic Meatloaf

Author: The Marigold Kitchen
This is the basic meatloaf recipe that you need.

Ingredients:

  • 1 pound lean ground beef
  • 1 pound ground pork
  • 1 1/2 cups oatmeal
  • 1 egg
  • 1/2 cup chopped onion
  • 1 teaspoon salt
  • 1/2 teaspoon pepper
  • 1 teaspoon Italian seasoning
  • 8 ounce can tomato sauce, divided
  • 1 tablespoon brown sugar

Instructions:

  1. Preheat oven to 350 degrees. Grease a standard sized loaf pan.
  2. In a bowl, mix the ground beef, ground pork, oatmeal, egg, onion, salt, pepper, Italian seasoning, and half of the tomato sauce.
  3. Put mixture into the prepared loaf pan and pat down lightly.
  4. In a small bowl, mix the remaining tomato sauce with the brown sugar.  Add salt and pepper to taste and mix in.
  5. Pour sauce over the meatloaf.
  6. Cover and bake for 60-65 minutes. Uncover for the last 10 minutes of baking.
  7. If you are freezing half, prepare two pans and divide the meat mixture and sauce between the two pans. Cover and freeze for up to two months. Thaw overnight in the fridge before baking.
Created using The Recipes Generator

Thursday, May 7, 2020

Perfect Fluffy Waffles

Waffles. They are perfect for breakfast, lunch, or supper. You can go traditional and add butter and syrup (my personal favorite!) or dress them up with whipped cream and fruit. Or how about chicken and waffles? They really are very versatile. And let's not forget delicious. They definitely are delicious. You just can't go wrong with waffles.


We eat a lot of pancakes and waffles at my house, especially for lunch. My dancer loves pancakes and my little farmer loves waffles, so we usually alternate between the two. If I were to choose, I'd have to side with my little farmer and go team waffles. We even go all out and celebrate birthdays with a stack of warm, fluffy birthday waffles (or pancakes) for breakfast. It has become a tradition that the kids look forward to every year. Birthday waffles with candles to celebrate another year of growing up are part of every birthday morning.


You don't need a fancy waffle maker to make great waffles. I have this Black and Decker one. It is simple, with no temperature dial or way to flip. I just plug it in and go, and the indicator light tells me when it's ready. Plus it is easy peasy to clean - bonus! I often make extra waffles and store them in the freezer. They make a great quick breakfast in the mornings, or even a great after school snack. I store each one individually in a sandwich baggie, then put them all in a freezer gallon ziploc.


Perfect Fluffy Waffles

Author: The Marigold Kitchen
Like the title says, these waffles are perfect and fluffy.

Ingredients:

  • 2 cups flour
  • 4 teaspoons baking powder
  • 1/4 teaspoon salt
  • 2 tablespoons sugar
  • 2 eggs
  • 1 3/4 cup milk
  • 1/2 melted butter

Instructions:

  1. Heat waffle iron and grease with cooking spray if necessary.
  2. Add dry ingredients to a bowl and whisk.
  3. Stir in wet ingredients and mix well.
  4. Add about 3/4 cup of batter to the iron for each waffle.
  5. Cook until done.
  6. This recipe was adapted from my favorite waffle recipe from Betty Crocker. https://www.bettycrocker.com/recipes/waffles/f4760054-72a9-4316-9377-f636dd58bc8e
Created using The Recipes Generator

Thursday, April 30, 2020

Spaghetti Sauce

Have I mentioned that I love pasta? If not, I love pasta. My kids love pasta. The farmer thinks we eat too much pasta. But when it comes to pasta, I'm not sure I need his opinion.😉
I created this sauce with a few extra veggies in it for my kids. They just aren't big veggie eaters, and I thought I could trick them into eating more with this sauce. And you know what? It worked. I learned to mince everything real fine, and they won't know the difference.


This is the sauce that I make when I have time for homemade sauce with my spaghetti and meatballs. It really is simple to make and uses ingredients that can be found in your pantry. I do use finely minced carrot and green pepper as my hidden veggies. The carrot adds the sweetness you need to cut the acidity from the tomatoes so there is no need for any sugar. In the summer, I throw in some hidden zucchini as well. (Shhh..... don't tell the kids!)


Spaghetti Sauce

Spaghetti Sauce
Author: The Marigold Kitchen
This sauce is simple to make and uses ingredients found in your pantry.

Ingredients

  • 2 tablespoons oil
  • 1/3 cup finely minced carrot
  • 1/4 cup finely minced green pepper
  • 1/2 cup diced onion
  • 3 large cloves garlic, minced (use 4 cloves if small)
  • 28 ounce can tomato puree
  • 1/2 teaspoon dried basil
  • 1/2 teaspoon dried oregano
  • 1/2 teaspoon Italian blend seasoning
  • 1/2 teaspoon salt
  • 1/2 teaspoon pepper
  • 1 cup water
  • 2 tablespoons Parmesan cheese

Instructions

  1. In a large skillet, heat 2 tablespoons oil on medium high heat.
  2. Add the carrot, green pepper, and onion. Cook for 5 minutes or until soft.
  3. Add the minced garlic and stir. Cook for 2 more minutes.
  4. Add the tomato puree, water, salt, pepper, basil, oregano, and Italian seasoning.
  5. Simmer for 20-30 minutes, until some of the water has reduced. 
  6. Stir in the Parmesan cheese.

Notes:

If you made meatballs, add them before you simmer. This sauce freezes well. Freeze it in a freezer safe container.

Meatballs

I've been making this meatball recipe most of my life. When I was growing up, this is the recipe that my parents used whenever we had spaghetti and meatballs. My parents didn't really measure the seasonings, and that is how I learned to add a little of this and a little of that.
As an adult, I've written down the measurements and made a couple changes. My parents always used ground beef for these meatballs. I still do sometimes, but I have found that my family prefers ground pork. I've determined set amounts for the seasonings, and I make sure to crush the saltines fine with my food processor. As a child, we used our hands and frustrations to crush the crackers.

I start by putting all of my ingredients into a bowl. You can mix the seasoning with the crushed crumbs first to make sure that the seasonings get evenly distributed. I like to use saltines instead of breadcrumbs because I think that it makes a sturdier meatball that can hold up to heavier sauces.

I mix everything up with my hands. I just don't see any better way to do it!

I preheat the oil in my cast iron skillet. The oil will take about 5-10 minutes to heat up on a medium high heat setting. I usually look for the oil to start to have a ripple look to it. It will have a consistency more like water.

Next up is making the meatballs. Most of the time, I use my hands to pick off sections of the meat mixture and roll into a ball. You can use a cookie scoop to make sure you get meatballs that are the same size.

Fry them up. See that golden brown color? That is perfect. You want to fry the meatballs for 15-20 minutes and use tongs to roll the meatballs around every few minutes to make sure that they cook on all sides.


See all these little bits and leftover oil? Don't toss it! This is perfect to start your sauce!

These meatballs are perfect for spaghetti and meatballs, meatball subs, casseroles, and Swedish meatballs. You can try them in your favorite recipes for meatballs.

If you are going to freeze the meatballs, cool them completely and store them in a freezer ziploc baggie. They are super convenient to have in the freezer on busy nights!


Meatballs

Author:
These are a perfect meatball for any dish!

Ingredients:

  • 1 pound ground pork
  • 1 sleeve saltine crackers (about 39 crackers)
  • 1 egg
  • 1/2 teaspoon salt
  • 1/2 teaspoon pepper
  • 1/2 teaspoon onion powder
  • 1/2 teaspoon garlic powder

Instructions:

  1. Crush the saltine crackers to make fine crumbs.
  2. Add all ingredients to a bowl and mix with your hands to combine.
  3. Preheat a skillet with 2-3 tablespoons oil.
  4. While the skillet heats, roll your meat mixture into meatballs. You can use a cookie scoop to get uniform meatballs.
  5. Fry meatballs for 15-20 minutes, rolling over every three minutes or so to allow for all sizes to cook and brown.
  6. Use the drippings and bits of meatball left in the pan to start your sauce, if needed.
  7. These also freeze very well. Store in a freezer gallon bag.
Created using The Recipes Generator

Thursday, April 23, 2020

Chicken Pot Pie

Chicken pot pie. Is there anything more comforting than this dish? The crust is buttery. The filling is creamy. I promise that the time it takes to make this is worth it. I have no other words. These pictures should speak for themselves.
This pot pie freezes well. If you are baking from frozen, wait to add the egg wash until right before baking. And bake for about 15-20 minutes longer.


Chicken Pot Pie

Author:
One of the best comfort foods.

Ingredients:

For the crust:
  • 2 2/3 cup flour
  • 1 teaspoon salt
  • 1 cup butter flavor vegetable shortening, cut into cubes
  • 1/4 to 1/2 cup cold water
For the filling:
  • 3 cups shredded chicken
  • 2 cups frozen vegetable mix
  • 1/2 cup butter
  • 1/2 cup flour
  • 1/2 cup chopped onion
  • 2 cloves minced garlic, 3 cloves if they are small
  • 2 cups chicken broth
  • 1 cup milk
  •  1 teaspoon salt
  • 1/2 teaspoon black pepper
  • 1/2 teaspoon dried oregano

Instructions:

Prepare the filling:
  1. In a large skillet or dutch oven, melt the butter. Add the onions and cook until tender and starting to turn translucent, about 3-5 minutes.
  2. Add flour and whisk. Cook for about 2 minutes.
  3. Add chicken broth and milk. Whisk until it starts to get thick.
  4. Stir in chicken, vegetables, garlic, salt, pepper, and oregano.
  5. Let filling simmer.
Prepare the crust:
  1. While the filling simmers, prepare the crust.
  2. Add flour and salt to a bowl. Cut shortening in with a pastry cutter. Add water a little bit at a time, adding just enough for the dough to come together.
  3. Divide dough into two portions. Roll out one portion and place in a 10 inch deep dish pie plate. You can also use a cast iron skillet lightly greased with oil or cooking spray.
  4. Pour filling into the crust.
  5. Roll out other portion and place on top of the filling. Seal the edges.
  6. Whisk an egg with 1 tablespoon water. Use a pastry brush to brush the egg wash over the crust.
  7. Vent the crust with a knife.
  8. Bake in an oven preheated to 350 degrees for 1 hour, or until crust is browned and filling bubbles up through the crust.
Created using The Recipes Generator

Friday, April 10, 2020

Simple Beef Maid Rites

The maid rite sandwich. These just might be the most popular sandwiches in Iowa. They are served at almost every potluck I've ever been to and I don't know anyone that doesn't like them.


Here is the recipe for the version that I make. Serve with macaroni and cheese, chips, soup, or even on hot dogs. I've even eaten it like a chip dip!


Simple Beef Maid Rites

Author:
These popular sandwiches are a crowd pleaser.

Ingredients:

  • 1 pound lean ground beef
  • 1 tablespoon onion flakes
  • 1/3 cup ketchup
  • 1 tablespoon yellow mustard
  • 2 tablespoons brown sugar
  • 1 tablespoon white vinegar
  • 1/4 teaspoon salt
  • 1/4 teaspoon pepper
  • 1/8 teaspoon garlic powder

Instructions:

  1. Brown ground beef with onion flakes. Drain any grease.
  2. Add ketchup, mustard, brown sugar, vinegar, salt, pepper, and garlic powder. Stir to combine.
  3. Simmer on medium to low heat for 10 minutes.

Notes:

This recipe doubles or triples well. Add the meat to a slow cooker so it stays warm and people can serve themselves.
Created using The Recipes Generator

Sunday, January 26, 2020

Bakin' Bacon

We love Sunday mornings in my house. They are slower and calmer than most mornings, and the Farmer can usually spend a little more time with us. I love that we can squeeze in this time to spend together as a family.

Most Sundays we have brunch, and as a pork producing family bacon or sausage is at the center of our meal. Breakfast food is a popular choice around here. I think my kids could live off of pancakes and bacon! Speaking of bacon, a several years ago I heard someone talk about how they bake their bacon instead of fry it on the stove top. Now, I love a good bacon-while-it's-cooking smell, but the scent of those tasty fried strips lingering into the afternoon isn't always pleasant. So, I started baking my bacon! Not only do you not have that lasting smell, but it is way easier and clean up is a cinch!

I start my lining a baking sheet with foil. This catches most of the grease, and I can toss it and the foil in the trash. Some grease will escape underneath the foil, but it cleans up easily. I lay the strips out in a single layer on the lined sheet. Some strips may overlap some, but as the bacon shrinks while it cooks it makes room for all the pieces.


I bake the strips in a 425 degree oven for about 15-20 minutes. How long you let the bacon bake depends on how well done you like your bacon. At about the 10 minute mark, I do turn my bacon over to help it crisp up on both sides and to rearrange those strips that may be crowded.


Once the bacon is done, I take it out of the oven and transfer it to a paper towel lined plate.


Perfect bacon every time!

If there is a slight chance that you have leftover bacon (is that even a thing?!), I stick the extra strips in to a freezer baggie and freeze it. I can then use it for breakfast or supper during the week, or anything else I need it for!

Sunday, November 3, 2019

Roasting Pumpkins

Fall is such a beautiful time of year. I love the colors of the sunsets, leaves, and pumpkins. I love the cooler days and trips to the apple orchard for fresh cider, apples, and pumpkins. We actually carved out first pumpkins this year! I always make sure to get sugar pumpkins while we are at the orchard. Sugar pumpkins are smaller than pumpkins you would use for carving. The inside is sweeter and creamier, making them better for eating, too.

I love to roast sugar pumpkins and make my own pumpkin puree. I use the puree just like I would the canned stuff.  The puree also freezes well. I can make some of my favorite pumpkin recipes any time for a fresh taste of fall.

I started by removing the stems from my pumpkins. If the stem is long enough, you can just grab it with your hands and break it off.


Then I cut the pumpkins in half. This can be hard to do, so be careful!


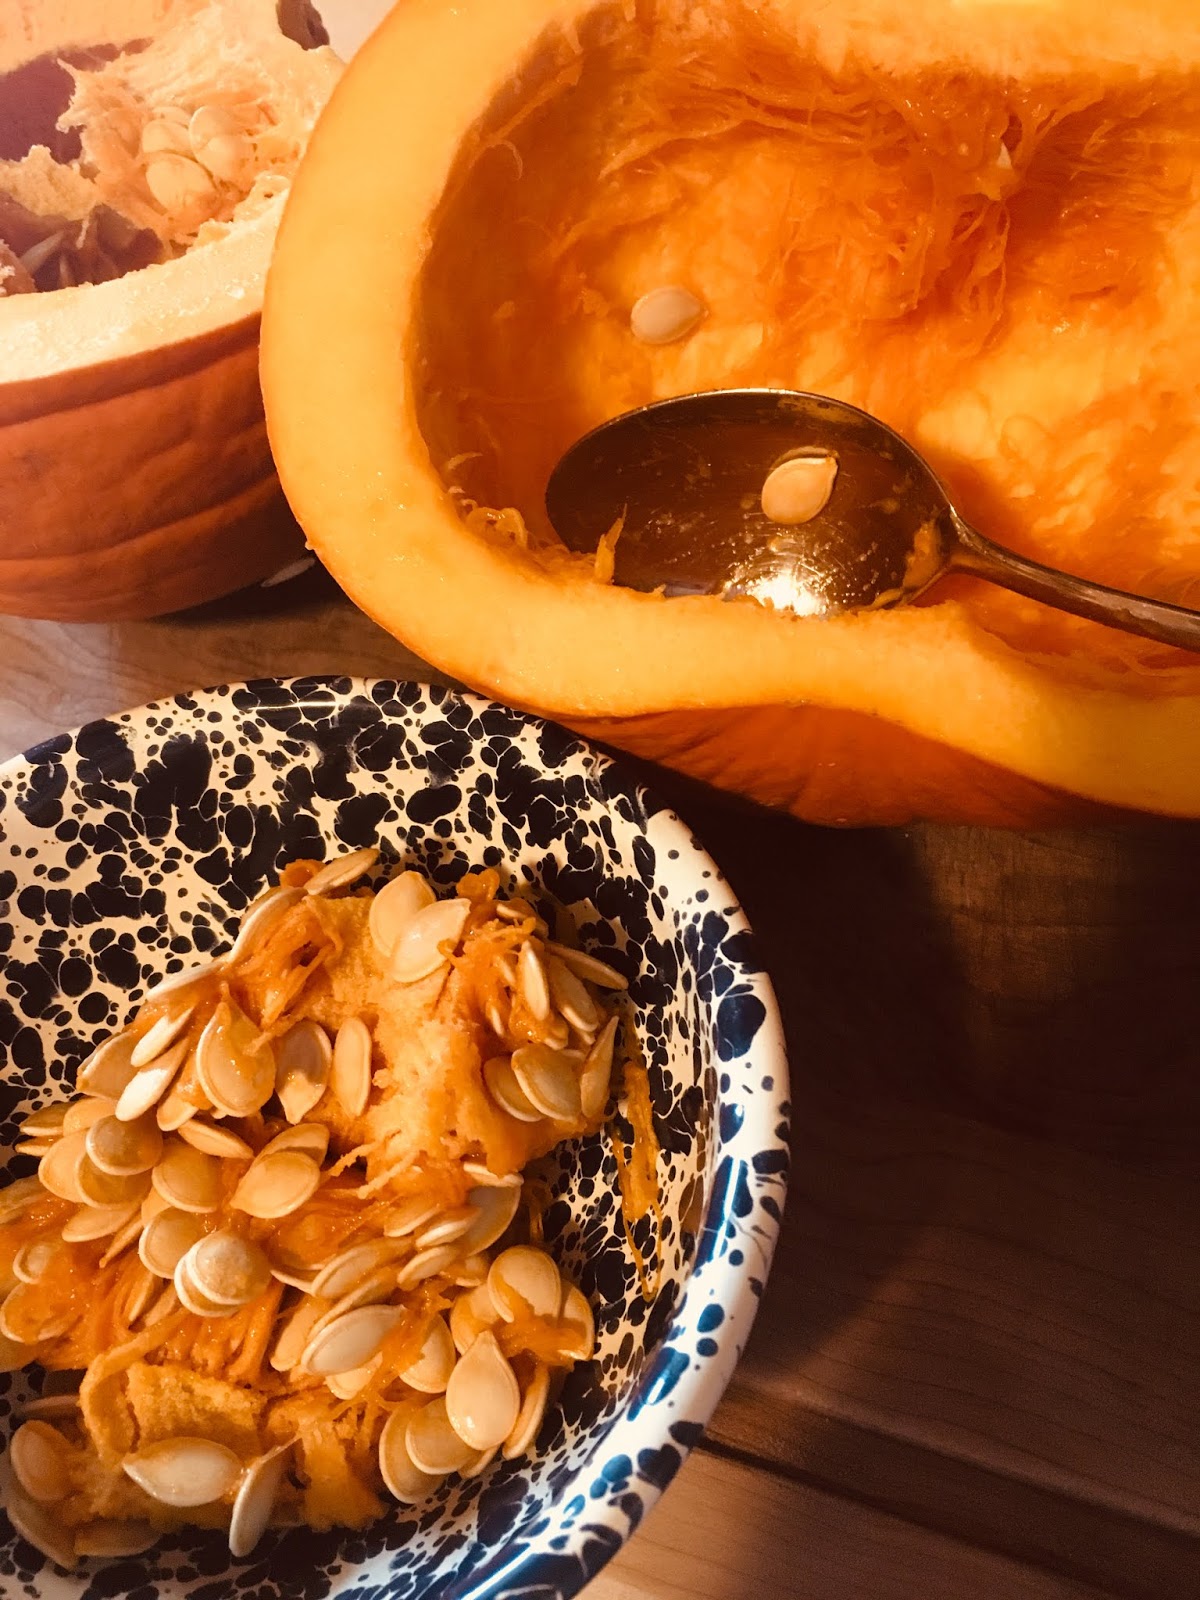
 I then used a spoon and my handy little Pampered Chef tomato corer to remove the insides. I actually never use my Pampered Chef tomato corer for tomatoes, just pumpkins.


Once you remove the insides, the pumpkins are ready to roast in the oven!


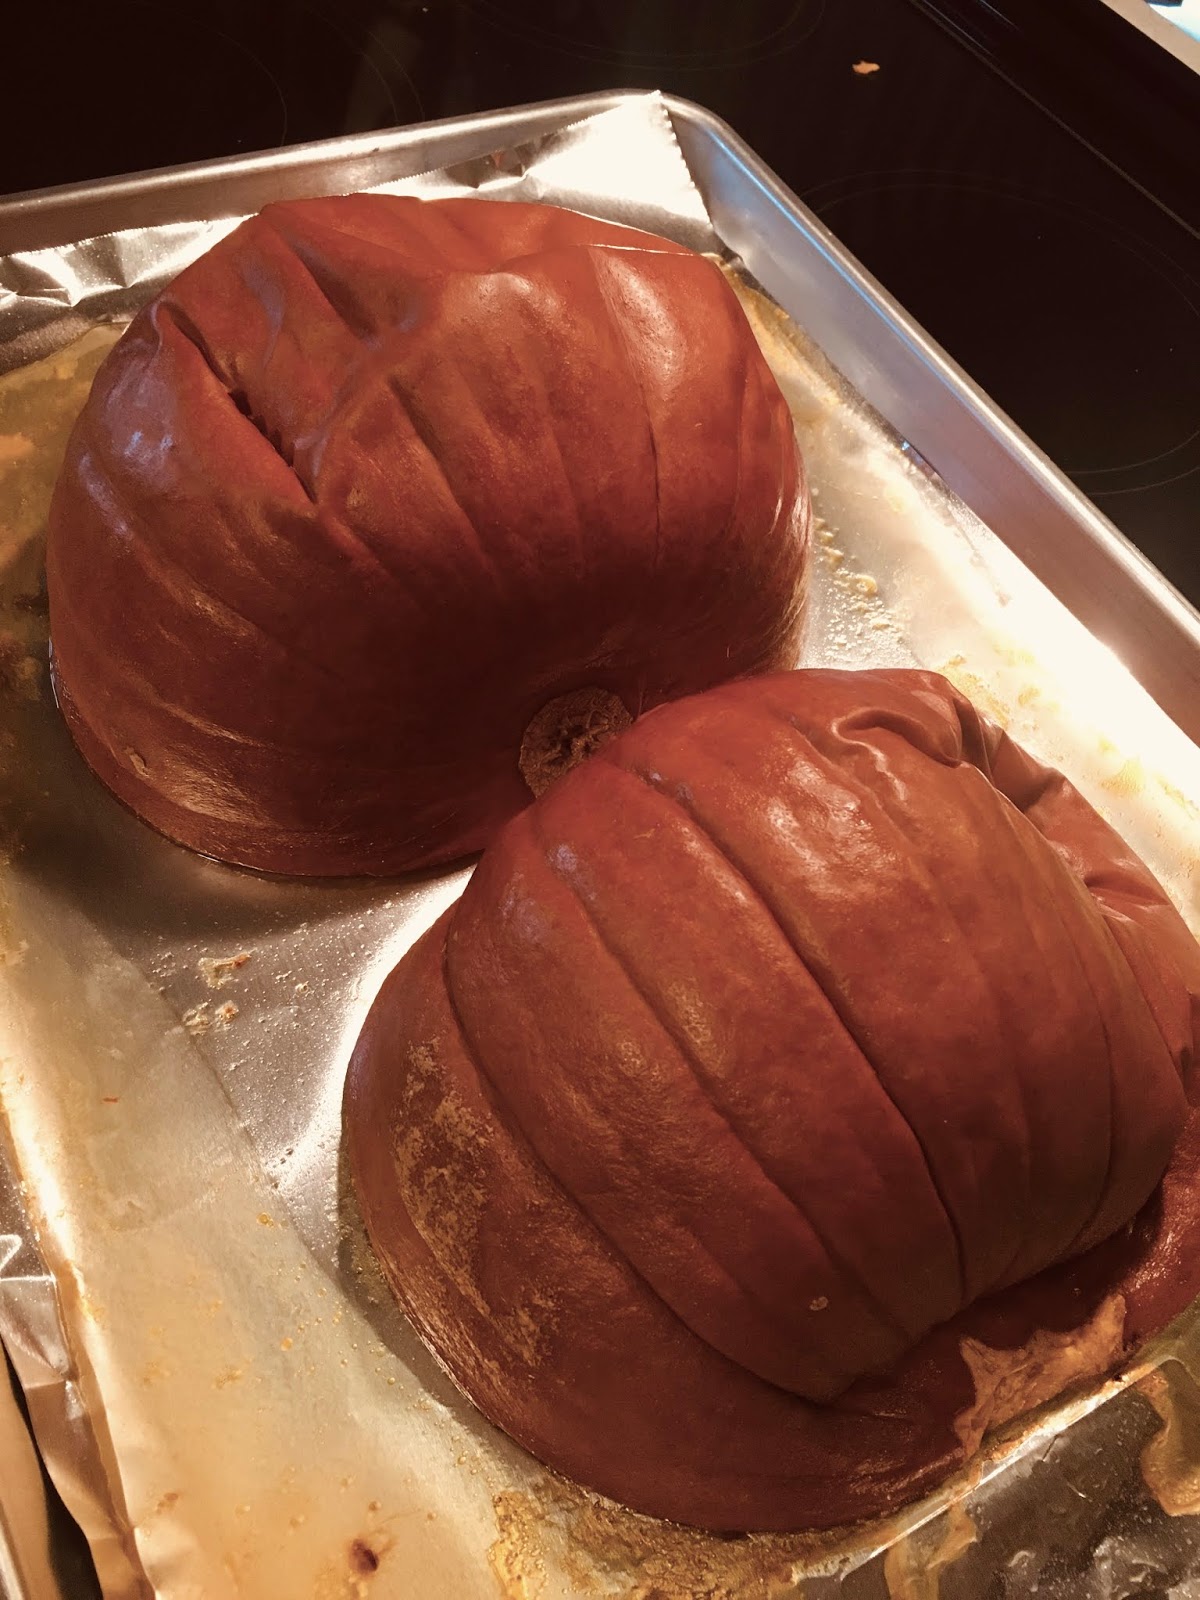
Line a baking sheet with foil and spray lightly with nonstick spray. Also, spray the edges of the pumpkin. Lay the pumpkin halves face down on the foil.


Bake at 350 degrees for about an hour, or until a fork easily pierces through the skin.


Cool for about 20 minutes or so. Then turn each half over and use a spoon to scoop out the soft, creamy flesh.


 Place the pulp in a bowl. You can blend the pulp at this point to make it smooth. I prefer to use a potato masher. 


You can use the pumpkin puree right away, or store in the fridge for a few days. I freeze most of the puree I get in freezer baggies with about 2 cups of puree in each one.


When I am ready to bake my Thanksgiving pies, muffins for breakfast, or my most requested pumpkin dessert, I thaw my pumpkin a few hours before use or overnight in the refrigerator.